Jump To
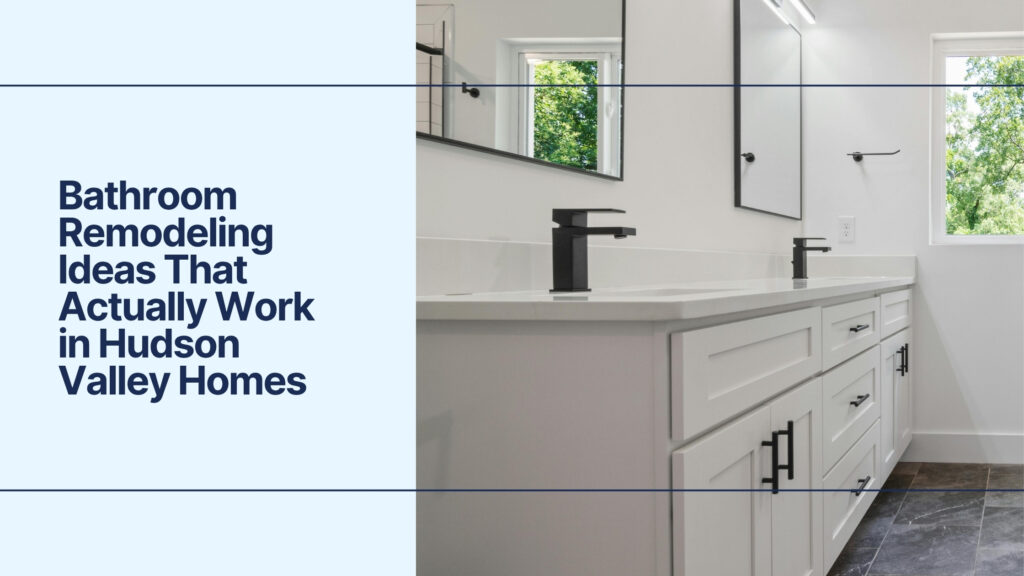
There's no shortage of bathroom remodeling ideas online. A five-minute scroll through any design platform will give you wet rooms with floor-to-ceiling marble, freestanding tubs positioned in front of floor-to-ceiling windows, and vanity walls that look like they belong in a boutique hotel. It's all beautiful. And for most Hudson Valley homeowners, almost none of it translates directly to their actual bathroom. The bathrooms we work in across Dutchess, Ulster, Orange, and Columbia counties tend to be compact, built before modern bathroom design was a consideration, and often the only bathroom in the house. That doesn't mean you can't create something genuinely beautiful and functional. It means the ideas you choose need to be filtered through what's actually possible in the space you have.
Shower Remodel Ideas: From Tub Conversion to Full Walk-In Upgrade
The shower is almost always the centerpiece of a bathroom remodel, and it's where the biggest visual transformation happens. It's also where homeowners have the most ideas and, sometimes, the most unrealistic expectations about what's possible in a tight space.
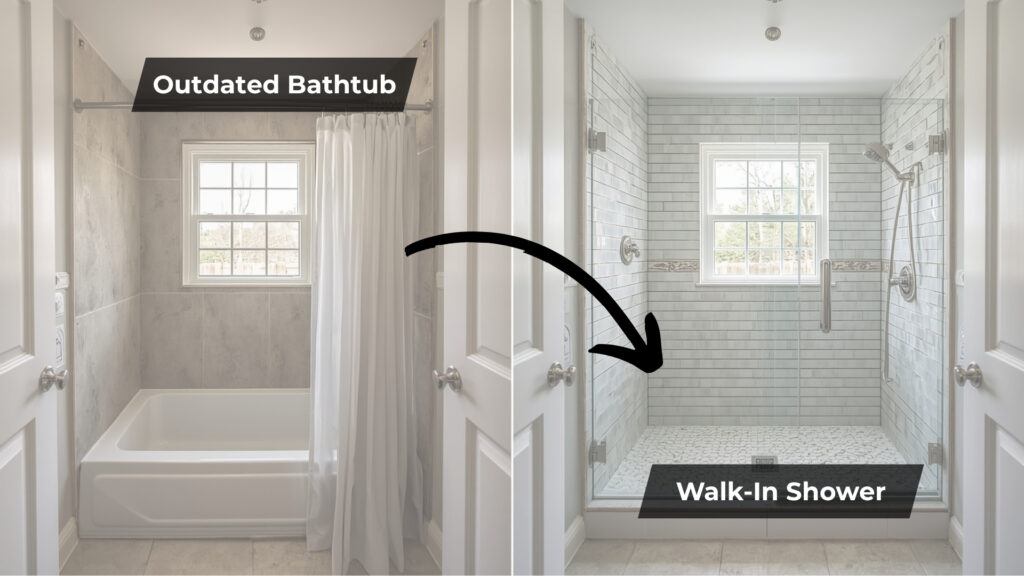
Tub-to-Shower Conversion
This is the single most common request we get from Hudson Valley homeowners, and for good reason. Many older homes in the region have bathrooms built around a standard tub that takes up most of the floor space, paired with a shower curtain that feels more like an afterthought than a design choice. Removing the tub and replacing it with a properly tiled walk-in shower opens the room considerably, both in terms of actual square footage and how the space feels. The caveat: if this is your only bathroom and you have young children or are planning to age in place, think carefully before eliminating the tub entirely. A tub-to-shower conversion is largely irreversible without a significant renovation, and the absence of a tub can affect resale appeal in family-oriented markets. For homes with a second bathroom or for households that genuinely never use the tub, it's almost always the right call.
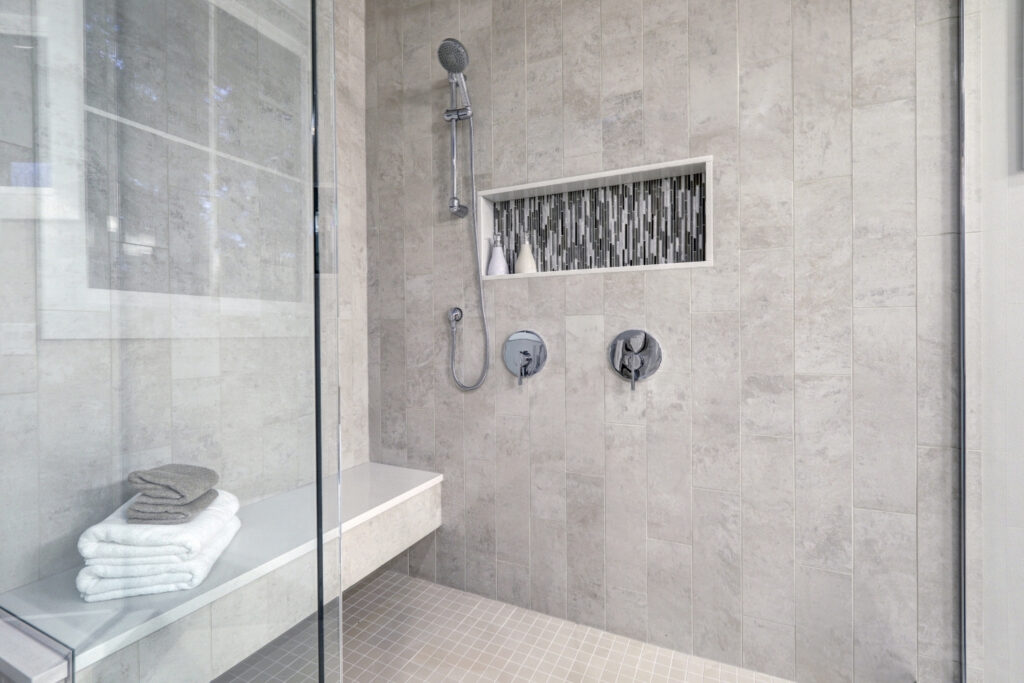
Curbless Walk-In Showers
One of the more transformative ideas we've seen applied to small Hudson Valley bathrooms is the curbless shower, with no threshold and the floor tile running continuously from the bathroom floor into the shower zone. The effect on the perception of space is significant. A room that feels cramped with a defined shower enclosure can feel genuinely open with a seamless floor transition. The practical requirement is a properly sloped floor that drains correctly without pooling. This is absolutely achievable but requires more careful work than a standard shower installation. In older homes where the subfloor may not be perfectly level to begin with, it's an area where cutting corners on execution creates long-term problems.
Frameless Glass Enclosures
Frameless glass is one of the most consistently impactful upgrades in a bathroom remodel. It makes the shower feel larger, keeps the eye moving through the space instead of stopping at a frame, and reads as genuinely high-end regardless of what tile is behind it. In narrow bathrooms, which describe most of what we work in across the Hudson Valley, frameless glass is often the difference between a bathroom that looks renovated and one that looks transformed. Budget note: frameless glass enclosures typically run $1,200–$2,500 installed depending on size and configuration. Semi-frameless is a middle option that costs less and still reads cleaner than a full aluminum-framed surround.
Built-In Niches and Shelving
A recessed niche is a built-in shelf inside the shower wall that provides convenient storage for shampoo, soap, and other toiletries. It can be tiled to blend seamlessly with the surrounding walls or designed with a contrasting tile for added visual interest. In homes with plaster walls, niches need to be cut between studs and the opening reinforced properly before waterproofing and tiling. It's not a complicated addition, but it's one that needs to be planned before work begins, not added as an afterthought when the walls are already tiled.
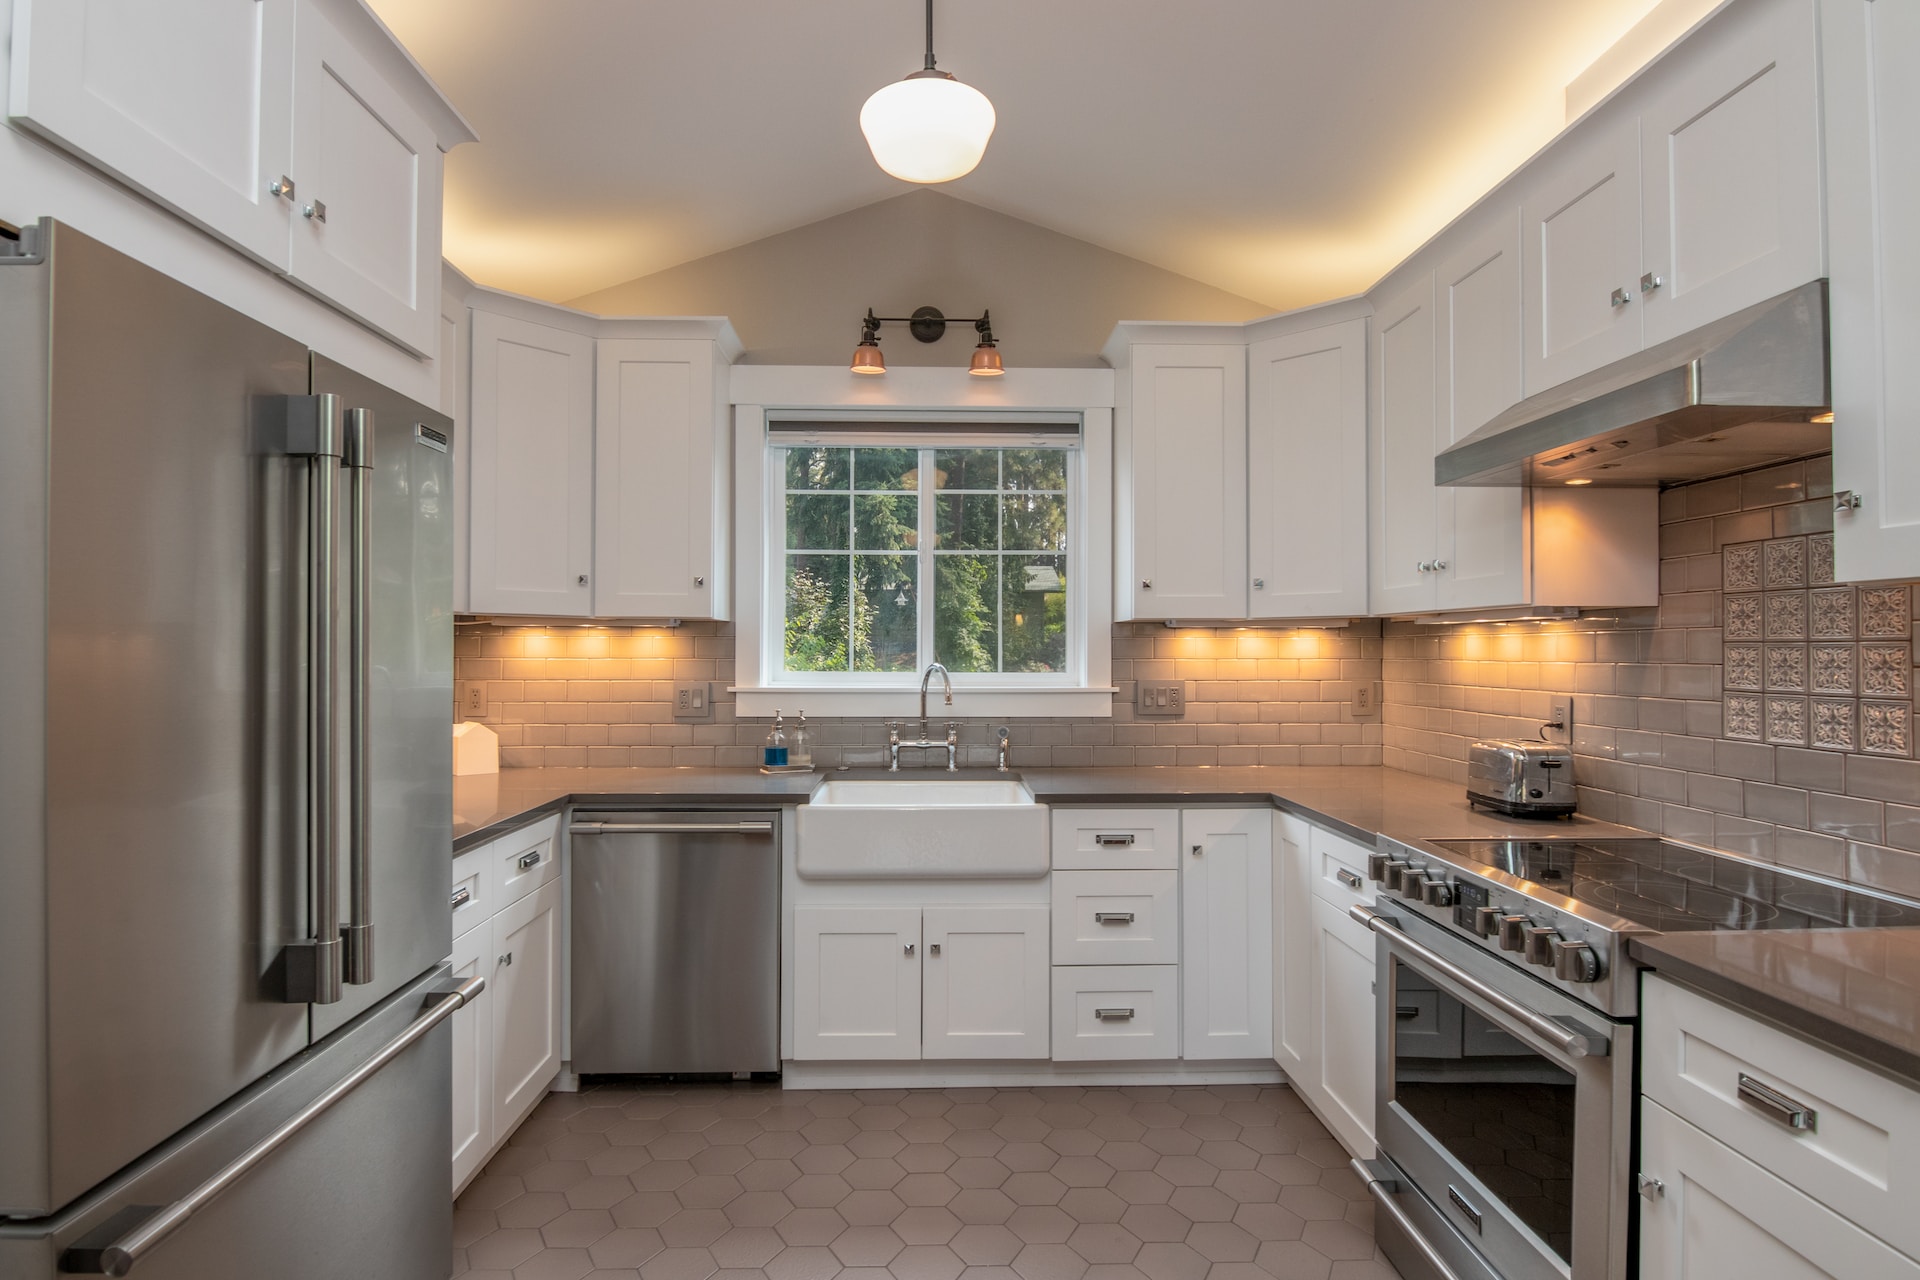
Vanity and Storage Ideas: Making Older Bathrooms Work Harder
Storage is the quiet frustration in most pre-1970 Hudson Valley bathrooms. These homes were built when bathrooms were utilitarian rooms, not spaces you spent time in. Addressing storage isn't just about function, it's about making the room feel like it was designed for how people actually live.
Floating Vanities
A floating vanity is mounted to the wall with the floor visible beneath it. It creates visual breathing room, makes the floor easier to clean, and pairs well with large-format tile. The honest caveat for Hudson Valley homes: floating vanities require the wall to be in good shape and the floor to be reasonably level. In older homes where walls have settled or where there's plaster over lath, installation is more involved than it looks. It's absolutely achievable, but budget for the wall prep work.
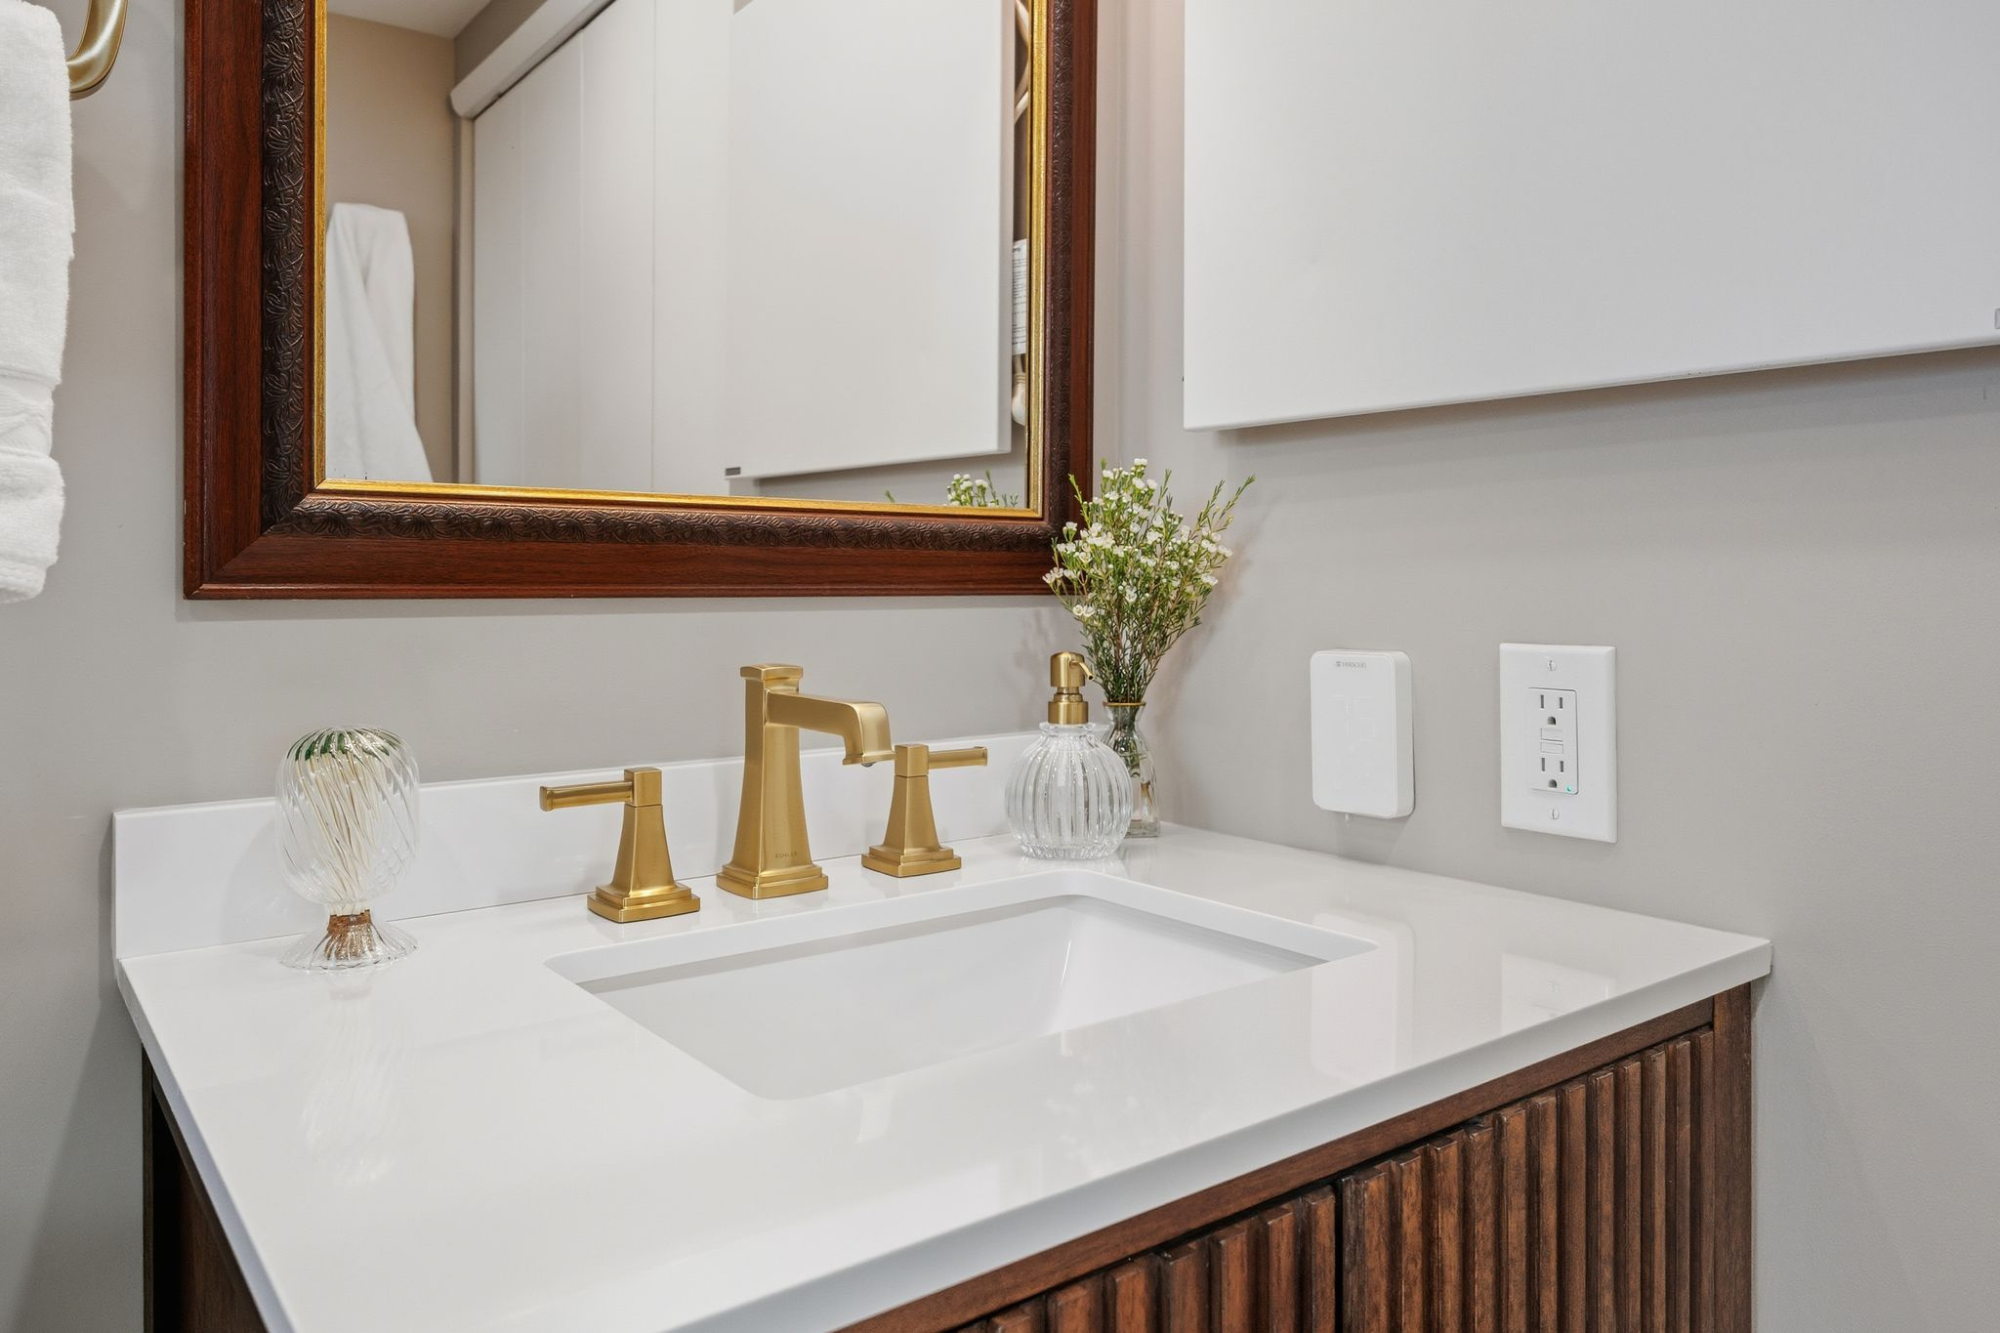
Deep-Drawer Vanities and Hidden Outlets
One of the most practical upgrades we've seen become popular in recent years is the storage-focused vanity with deep drawers rather than cabinet doors, and a hidden outlet built into the top drawer for hair dryers and electric toothbrushes. It eliminates a significant amount of daily visual clutter and makes a bathroom feel dramatically more organized without adding any square footage.
Recessed Medicine Cabinets
A recessed medicine cabinet built into the wall rather than surface-mounted adds substantial storage without projecting into the room at all. In bathrooms where every inch counts, it's a solution that was popular in older homes for good reason and is due for a comeback. Pair it with a quality light fixture above, and it looks intentional rather than purely practical.
Hardware and Finish Choices in 2025–2026
The hardware finish you choose affects how the entire bathroom reads. Chrome has largely given way to warmer tones. Brushed gold, matte black, and unlacquered brass are what we're seeing most frequently in current projects, and for good reason. These finishes complement warm tones in wood vanities and natural stone, and work particularly well against the character that older Hudson Valley homes already carry. One practical note: commit to a finish and use it consistently throughout the room, including faucet, showerhead, towel bars, toilet paper holder, and drawer pulls. Mixing finishes can work but it requires a deliberate eye. Accidental mixing just looks inconsistent.
Tile Ideas: What Holds Up, What Photographs Well, and What Actually Looks Good in Five Years
Tile is the decision homeowners agonize over most and the one they're most likely to regret if they follow a trend too closely. There's no single right answer, but there are decisions that age well and ones that don't.
Large-Format Floor Tile
Large-format tile (12x24 or larger) on the floor looks modern and is genuinely easier to clean than smaller formats with more grout lines. In a small bathroom it can also make the floor feel more expansive. The constraint in older Hudson Valley homes is the subfloor. Large tiles are unforgiving of an uneven base, and in homes with original wood subfloors over older joists, we almost always need to add a layer of cement backer board and assess the deflection before committing to large format. If that work isn't done properly, you're re-tiling in five years.
Statement Tile and Accent Walls
A practical approach: keep main surfaces simple and neutral, then add interest in one specific area. Classic tiles in white, beige, or light gray for most of the room, with a different tile design in the shower niche, on one wall, or on the floor to create a focal point. This approach keeps the space looking clean and timeless while still adding character. And if your taste evolves in ten years, you're not staring at a maximalist pattern choice you made everywhere.
Zellige Tile
The handmade Moroccan tile with a slightly irregular, glossy finish has been showing up consistently in high-end remodels and works particularly well in older homes with character. It's not perfectly uniform, which actually complements rather than fights the slight imperfections in older construction. The maintenance reality: the variation in the glaze means more visible soap scum than a smooth tile. Worth knowing before you fall in love with it.
Marble-Look Porcelain
Almost every homeowner wants the look of marble. Almost no one wants to deal with the maintenance of actual marble, including the sealing, staining, and etching from acidic products. Marble-look porcelain has gotten genuinely good in recent years; the better versions are difficult to distinguish from real stone in a finished bathroom. It's harder, non-porous, requires no sealing, and costs a fraction of natural marble. For most Hudson Valley homeowners, it's the right call.
The Grout Decision Nobody Talks About Enough
Grout color changes the entire character of a tile installation. White tile with matching white grout reads seamless and spa-like. White tile with dark grout makes the tile pattern the visual feature. The same tile in the same layout can look completely different based purely on this one decision. It's worth looking at actual samples in your specific bathroom light before committing. And regardless of color, always use an epoxy or stain-resistant grout in a shower. Regular grout in a wet area is a maintenance problem you're building in from day one.
Bathroom Lighting Ideas: Why Most Remodels Get This Wrong
Lighting is the most consistently underthought element in bathroom remodels. Homeowners spend weeks deciding on tile and an afternoon on lighting, then wonder why the finished bathroom doesn't feel quite right when they're actually using it. In older Hudson Valley homes where bathrooms often have one small window or none at all, this matters more than almost anywhere else.
The Three Layers of Bathroom Lighting
A well-lit bathroom has three layers: ambient (general overhead illumination), task (lighting specifically for the vanity and mirror), and accent (recessed lighting in the shower or under-vanity lighting that creates depth). Most bathrooms we walk into for the first time have one single ceiling fixture that does all three jobs poorly.
Vanity Lighting: Position Matters More Than Fixture Style
The most common mistake in vanity lighting is a single overhead bar that casts downward shadows on the face. Side-mounted sconces at roughly eye level, one on each side of the mirror rather than above it, eliminate shadows and provide genuinely flattering light for the morning routine. If you can only do one lighting upgrade in a bathroom remodel, this is it. The difference is not subtle.
Recessed Lighting in the Shower
A properly waterproofed recessed light in the shower ceiling transforms the shower from a dim corner into a feature of the room. It needs to be a wet-location rated fixture and on a separate switch from the main bathroom lighting. This requires an electrician running a new circuit, which means it needs to be planned before walls are closed up. Adding it after the fact is expensive and disruptive.
Dimmers: The Cheapest Upgrade That Changes How a Bathroom Feels
A dimmer switch costs under $30. It turns a bathroom that has one setting, bright, functional, clinical, into a space that can feel relaxing in the evening. It's a small thing that makes a disproportionate difference in how much people enjoy the finished space.
Comfort Upgrades Worth Considering for Hudson Valley Winters
This is the section you won't find in a national bathroom ideas guide. These upgrades make particular sense in the Hudson Valley because of the climate and because of what's typically missing from the older homes in the region.
Radiant Heated Floors
If you're already tearing out the floor for a remodel, adding radiant heat underneath the new tile costs relatively little in the context of the full project and pays back in daily comfort for as long as you live in the house. Electric radiant mats typically cost $8–$15 per square foot installed. In a 50-square-foot bathroom, you're looking at $400–$750 added to a remodel already in progress. The cost to add it after the fact, when the floor is already tiled, is much higher. In a region where stepping onto a cold tile floor at 6 a.m. in February is a daily reality, this is one of those upgrades homeowners consistently say they're glad they added.
Proper Ventilation — The Unsexy Upgrade That Matters Most
Most older Hudson Valley bathrooms are chronically under-ventilated. Poor ventilation is the primary cause of mold growth in bathrooms, peeling paint, and the gradual deterioration of grout and caulk joints. Replacing an inadequate exhaust fan with a properly sized, quiet, humidity-sensing model that actually vents to the exterior is one of the most protective things you can do for the longevity of a bathroom remodel. It costs $150–$400 for a quality fan. It doesn't photograph well. Nobody ever mentions it when they show off their remodel. And it will protect the investment you just made in tile and finishes for the next twenty years.
Insulated Exterior Walls
If your bathroom sits on an exterior wall and you're already opening that wall for plumbing or electrical work, addressing the insulation is worth the conversation. Many pre-1960 homes have minimal or no insulation in bathroom walls, resulting in a room that's genuinely cold in winter and that builds up condensation on wall surfaces, accelerating deterioration of everything above the tile line. A properly insulated exterior wall means a room that holds warmth, stays drier, and doesn't develop the chronic moisture problems that eventually require another renovation.
Heated Towel Bars
A hardwired heated towel bar costs $200–$500 installed. It keeps towels warm and dry, eliminates the slightly damp towel problem endemic to bathrooms without great airflow, and adds a small but genuine daily luxury that feels disproportionate to its cost. In a region with cold winters and older homes that run drafty, it's a detail that gets noticed.
How to Turn Bathroom Ideas Into a Real Remodel Plan
The gap between a list of ideas you love and a remodel plan you can actually execute comes down to a few practical filters. Here's how we help homeowners work through them.
Budget by Impact
Not all ideas cost the same and not all of them deliver the same visual return. If you're working with a constrained budget, the highest-impact moves in most Hudson Valley bathrooms are: a tiled walk-in shower with frameless glass, a new vanity with proper storage, and updated lighting. These three changes alone account for the majority of the transformation in most before-and-after photos. Heated floors, statement tile, and premium fixtures are meaningful upgrades, but they're the second tier.
What's Constrained by Your Existing Layout
Some ideas are flexible, you can choose almost any tile, vanity, or fixture regardless of your existing layout. Others are constrained by where your plumbing currently lives. Moving drain locations and supply lines is possible but it adds cost and time. If a shower niche, a double vanity, or a curbless floor are ideas you want, the first question is whether your existing plumbing placement supports them without major relocation. That's a conversation to have with your contractor before you fall fully in love with a specific plan.
The Live-With-It Test
Before committing to tile, finishes, or fixtures, bring samples into your actual bathroom. Tile looks different under your specific bathroom light than it does in a showroom or on a screen. A warm beige that looked beautiful in a tile store can read yellow under certain lighting conditions. A dramatic dark tile that looked stunning in a large showroom display can feel oppressive in a 45-square-foot bathroom. Actual samples, actual room, actual light prevents the most common and most expensive form of remodel regret.
Remodel Impact Checklist
- ✓ Replace tub with a tiled walk-in shower (frameless glass for maximum impact)
- ✓ Upgrade to a storage-focused vanity with deep drawers and hidden outlet
- ✓ Switch to side-mounted vanity sconces at eye level
- ✓ Add a wet-rated recessed light inside the shower on its own switch
- ✓ Install radiant heated floor mats during the floor demo phase
- ✓ Replace exhaust fan with a humidity-sensing, exterior-vented model
- ✓ Use epoxy or stain-resistant grout throughout the shower
- ✓ Commit to one hardware finish used consistently across all fixtures
What to Expect: Bathroom Remodel Timeline
1
Day 1: Free Estimate and Scope Review
We assess the space, discuss your ideas, and give you an honest read on what's achievable in your specific home and budget.
2
Week 1–2: Material Selection and Scheduling
You choose tile, fixtures, vanity, and finishes. We coordinate delivery, subfloor assessment, and confirm your start date.
3
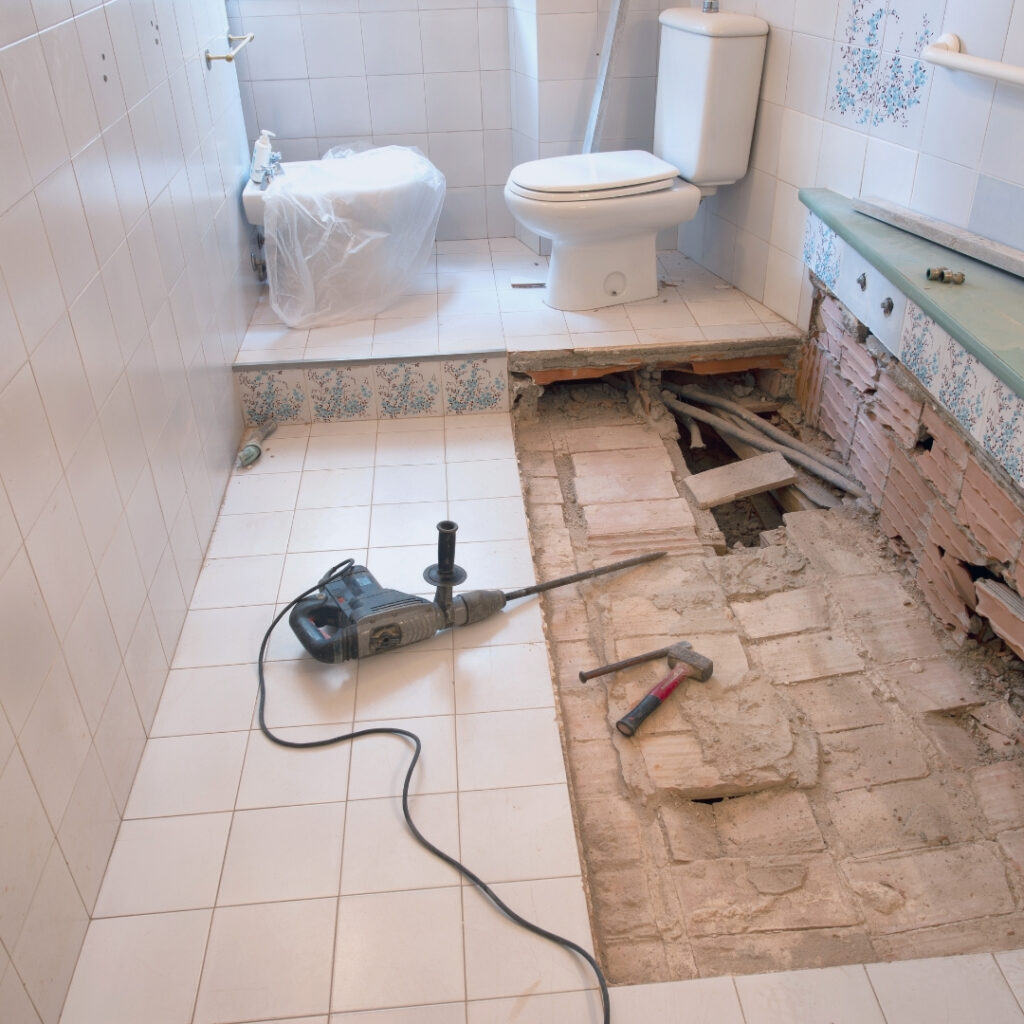
Week 2–3: Demolition and Rough Work
Existing tub, tile, and fixtures are removed. Plumbing, electrical, subfloor prep, and any wall insulation work is completed before new material goes in.
4
Week 3–4: Installation
New shower, tile, vanity, lighting, frameless glass, heated floor, and all fixtures are installed by our licensed team.
5
Final Walkthrough and Sign-Off
We walk through everything with you before we consider the job done. No loose ends, no surprises.
Bring Your Ideas to Keen Improvements. We'll Tell You What's Possible.
We've worked in enough Hudson Valley homes to know what a curbless shower, a floating vanity, or a heated floor actually requires in your specific house. If you have a list of ideas and want an honest read on what they look like for your space and budget, we're happy to start that conversation. Licensed, insured, and BBB A+ Accredited.
Get Your Free Estimate
Mt. Kisco
118 N Bedford Rd #100, Mt Kisco, NY 10549
(914) 410-6209
(914) 410-6209
Marlboro
63 South St, Marlboro, NY 12542
(845) 440-1010
(845) 440-1010